Vinyl label printers for business and production needs
13th Nov 2026
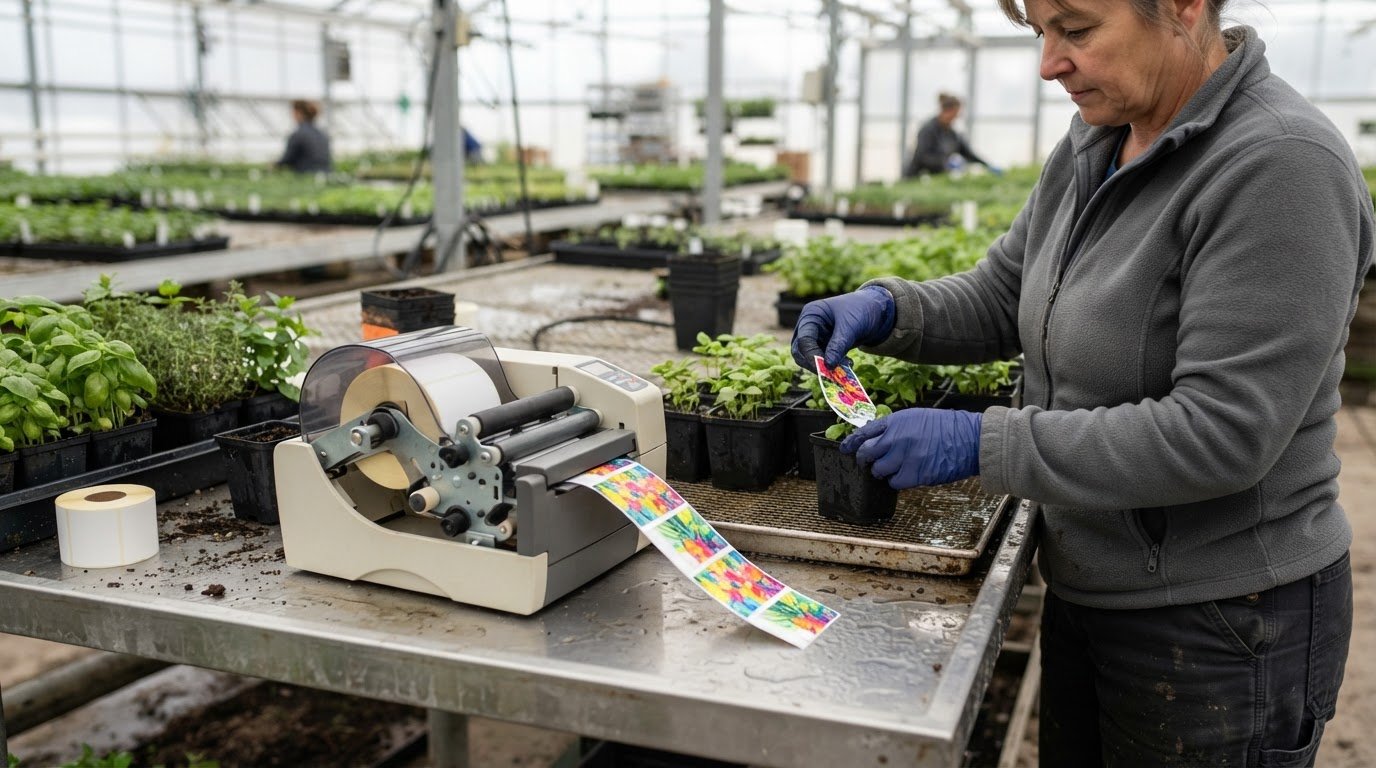
A faster print speed doesn’t automatically make a vinyl label printer right for your production needs. Media compatibility, colour output, maximum label width and connectivity all affect how well a printer fits the job.
When comparing printers, look for dependable output and a pace that keeps work moving. Also consider what the labels must withstand. For labels exposed to water or condensation, water-enhanced dye inks may be a better choice than standard dye inks.
This guide compares vinyl label printers by media compatibility, colour profiles, maximum label width, print speed and connectivity. It also explains how cartridge capacity and an internal or external label unwinder can affect the printer’s fit in your workspace. Use these factors to narrow your options to equipment that supports your production needs.
Key Takeaways
- Match printable media and ink type to the label’s intended use, especially if it may encounter water or condensation.
- For controlled products received from a laboratory supply house in containers of less than 10 kg, Canadian workplace rules require labels to disclose the product identifier, according to Department of Justice Canada.
- Consider whether a desktop printer fits your workspace and production needs before choosing a larger setup.
- Compare maximum label width and print speed against the formats and volume your workflow requires.
- Review connectivity options alongside your existing devices and processes to find a practical fit.
Compatible media and colour profiles
Vinyl is a media type, not a guarantee that every printer can handle it. Check that the printer supports the material’s construction, thickness, adhesive and roll format. Match the stock specifications to the printer’s supported media and feed path, then run a sample using the intended label size. This can reveal feed problems, uneven ink coverage or colours that differ from the design.
Start with the label’s end use. A product label on a dry container has different requirements from one exposed to condensation on frozen food. Check that the ink is intended for the expected exposure and that the vinyl stock suits the surface. Choose a media setting that matches the stock, then inspect a test print for colour consistency, fine text and small symbols.
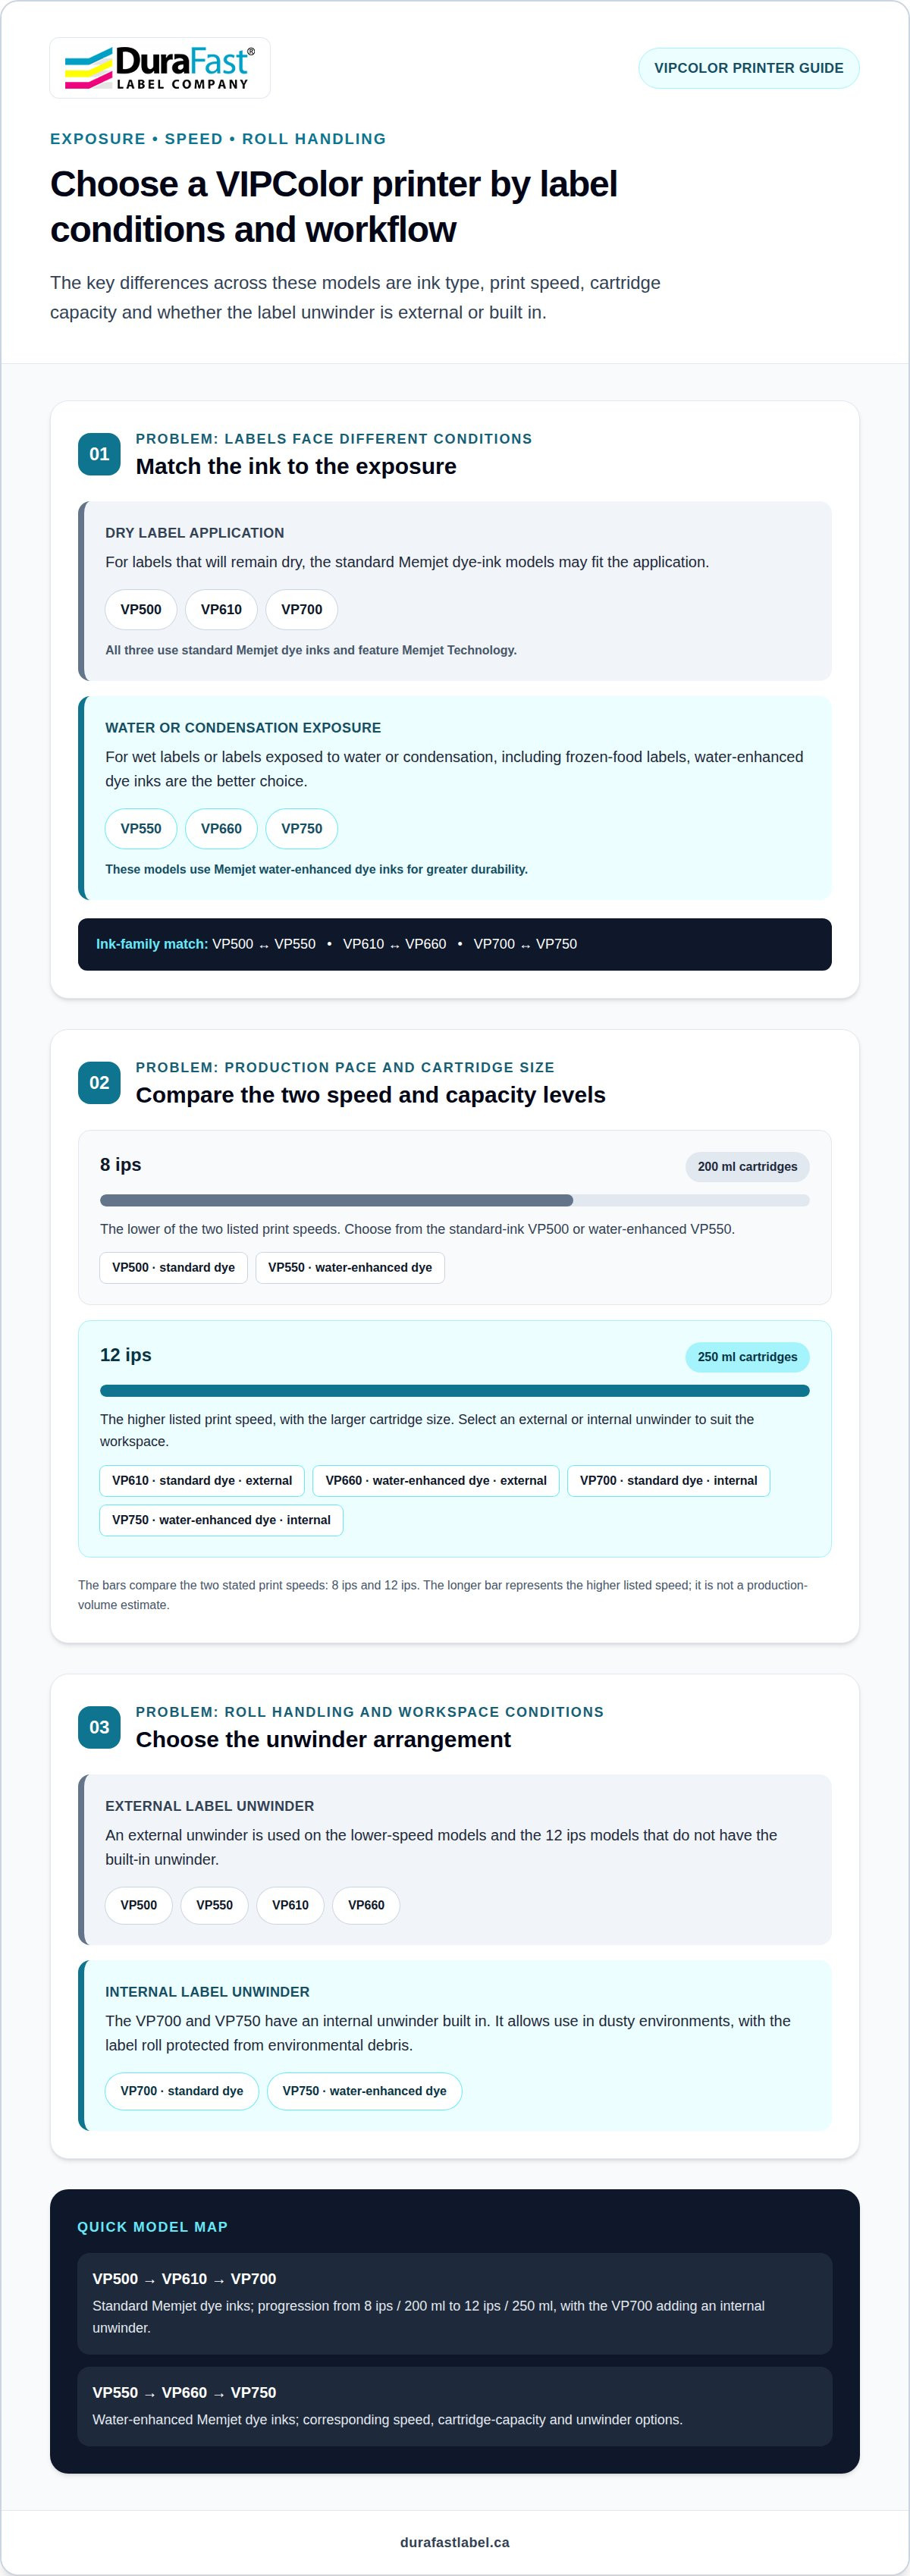
How durable and waterproof are printed vinyl labels? Vinyl alone doesn’t make the printed image waterproof; durability depends on the stock, ink and exposure. For wet labels or labels exposed to water or condensation, Memjet’s water-enhanced dye inks in the VP550, VP660 and VP750 are better choices than standard dye inks.
Those model differences help narrow the choice. The VP500, VP610 and VP700 use standard Memjet dye inks, while the VP550, VP660 and VP750 use water-enhanced dye inks. If labels will remain dry, the standard-ink models may fit the application. For frozen-food labels exposed to condensation, the water-enhanced models are the more suitable option. Test the selected vinyl and ink together under the conditions the label will encounter.
Plan the printed information before approving artwork. According to Competition Bureau Canada, mandatory label information in Canada must appear in English and French, except the dealer’s name and address, which may appear in either language. For controlled products received from a laboratory supply house in containers of less than 10 kg, Canadian workplace rules require labels to disclose the product identifier, according to Department of Justice Canada. These details affect text layout, legibility and available label space.
Colour output needs a practical review, not just a screen check. Print a sample on the chosen vinyl, compare key colours and fine details, then adjust the design or media setting if needed. For a card-grading application, an inkjet card grading label is an example of matching printed information to a specific label task. Approve the sample only after confirming the stock feeds correctly and the required text remains clear.
Desktop label printers
A desktop printer can suit a workbench, packing station or small production area where space is limited. It still needs to support the required label material, roll format and print method. First confirm that the device can print on your chosen vinyl, then test feed, colour, text clarity and adhesion on the intended surface.
Inkjet vs laser printers for printing vinyl labels: which is better? Neither is automatically better. Compatibility between the printer and vinyl media is what matters. An inkjet can print stickers on printable sticker paper compatible with the device, while laser printing requires media designed for laser printers.
Desktop models vary in how they handle individual labels, continuous media and finished output. Before choosing, map the full task:
- Media path: Check whether the printer accepts the vinyl’s format and feeds it reliably.
- Print layout: Match label dimensions and artwork to the printable area, leaving room for text and any required markings.
- Finishing: Decide whether labels will be removed by hand or need a cutter for separation.
- Workstation: Consider where the printer, label stock and finished rolls will sit during production.
A cutter can reduce hand separation, but only if its cut style suits the label format. Separate product labels, for example, may need different handling from continuous vinyl tape. Confirm whether the printer includes a cutter or requires a separate finishing step. Also consider the backing and waste, since both affect how you handle finished labels at the workstation.
Do Canadian labelling rules require specific information on product labels? Yes. According to Competition Bureau Canada, mandatory label information in Canada must appear in English and French, except the dealer’s name and address, which may appear in either language. Leave space for both languages in the design before choosing a desktop model.
Test a desktop printer before using it for routine production. Print several samples using the intended vinyl, artwork and layout, then check small text, colour, feed consistency and cut position. If the label will go on a curved container, test it on that surface too. A flat sample alone won’t show whether the label’s size and layout work on the actual package.
For a desktop setup, media compatibility and finishing needs should guide the choice before convenience features. If you’re mapping a label workflow, talk through your printing requirements.
Maximum label width
A printer’s supported media width affects which labels it can feed and print. This affects artwork layout, label orientation and how much information fits on each label. Match the printer’s supported width to the finished label format, not just the roll’s outside measurement. A roll may fit the holder and still exceed the printable area.
Distinguish media width from printable width. Media width is the width of the stock passing through the printer; printable width is the area available for ink. Non-printable margins can leave less room for artwork than the full label face suggests. For a wide product label, fit text, a logo and required information within the printable area. A sample print will show whether the design fits without crowding.
Measure the label face at its widest point and compare it with the printer’s supported media and print widths. Include the liner and edge guides when assessing the media path. If the design runs close to the edges, leave room for alignment variation instead of placing text or key graphics at the boundary. This matters for small identifiers as well as large areas of colour.
Orientation can help you make better use of the available width. A rectangular label may fit more easily when rotated, provided the printer and layout support that format. Check whether rotation changes text direction, barcode placement or feed order. For example, a design that prints clearly in landscape orientation may need a different layout in portrait orientation.
- Measure: Record the label face width and the total media width, including its liner.
- Compare: Check both measurements against the printer’s supported media width and printable area.
- Test: Print the actual artwork and inspect edge spacing, alignment and legibility.
- Confirm finishing: Make sure any cutter or rewinder can handle the chosen label format.
A tape format is different from a die-cut label roll. For instance, 2-inch vinyl tape suits continuous identification tasks, while a product label may need a specific face shape and finished width. Treat the media format as part of the width decision, since it affects feeding and how printed output separates.
Before choosing a printer, note the widest label format in your workflow and compare it with the supported print area. If future designs may need more room for text or graphics, include that in your decision. A printer that supports the label width you actually need can help you avoid redesigning artwork or changing media formats later.
Printing speed
A printer’s rated speed helps estimate output, but it doesn’t tell the whole production story. Speed is commonly stated in inches per second (ips), describing how quickly media moves during printing. Compare an 8 ips rating with a 12 ips rating, then consider how the printer will handle your actual artwork, label format and production routine.
Rated speed is most useful when comparing similar jobs. A run of simple labels may print differently from artwork with detailed colour, small text or broad areas of coverage. Label length also affects how quickly each label comes through: a short label may finish sooner than a longer one, even at the same rated speed.
Production time involves more than printing. Loading media, starting the job, handling finished labels and making adjustments all affect how many usable labels are ready. A cutter or separate finishing step can also affect the pace. Assess the whole process rather than treating the highest ips figure as a guarantee of finished output.
Use a sample run to compare speed and print quality. Print your expected artwork on the intended media, then inspect small text, colour and alignment at the planned setting. If a faster setting makes fine details harder to read, the time saved may not be worthwhile. For a vinyl label printer, the right balance supports production flow and legible results.
Cartridge capacity can also influence how smoothly a long job runs. For example, one model in the supplied range prints at 8 ips and uses 200 ml cartridges, while another prints at 12 ips and uses 250 ml cartridges. Compare speed and cartridge capacity together when planning longer production runs, since they describe different parts of the workflow.
Use these steps to assess a printer’s pace:
- Define the run: Note the label length, artwork complexity and quantity required for a typical job.
- Compare rated speeds: Treat ips as a useful specification, not a complete measure of finished output.
- Time the full task: Include loading, printing, cutting and handling in your workflow assessment.
- Review the sample: Confirm that text and graphics remain clear at the chosen speed.
For instance, an 8 ips configuration may suit a workflow where print detail or controlled handling takes priority. A 12 ips configuration may be more suitable when faster output matters and the finished labels remain clear. The best choice depends on the job, not the speed figure alone. Record the sample results alongside your production requirements to make a practical comparison.
Wireless and network connectivity
Connectivity determines how label jobs reach the printer and where staff can send them from. USB suits a dedicated workstation, while Ethernet can connect a printer to a wired office network. Wi-Fi can reduce cable runs when the printer and network support wireless printing. Choose the connection that fits the actual route from artwork to printed label.
Start by mapping the users and devices involved. Note whether labels are designed on one Windows computer, several workstations or a production computer running label software. Then check the printer’s interfaces and confirm compatibility with the software and operating system. A connection that works for one workstation may not suit a shared production area.
Depending on its connection and configuration, a network printer can be accessible from more than one authorized workstation. This can help when design staff prepare artwork centrally and production staff print elsewhere. A direct USB connection keeps printing tied to one computer, which can simplify a small, dedicated setup. Neither arrangement is right for every workflow.
Test wireless placement in practice. A printer beside a packing bench may be convenient, but the signal and network access must still support dependable job submission. Test from the computer or workstation that will send the label files. For a wired setup, check that the cable reaches the printer location without obstructing the label-handling area.
Consider the entire print path, not just the connection listed in a product specification. Label design software, printer drivers, operating system and connection method all need to work together. If artwork is saved on a shared computer, decide how production staff will access the files and submit jobs. A clear routine can reduce version confusion and help prevent printing the wrong layout.
- List the endpoints: Identify each computer or workstation that needs to print.
- Choose the route: Match USB, Ethernet or Wi-Fi to the printer location and user workflow.
- Test the software path: Send a sample label from the actual design application and workstation.
- Set access expectations: Decide who prepares files, starts jobs and manages the print queue.
For a small operation with one label-design computer, a direct connection may keep setup simple. A shared packing area may benefit from network access if the printer and software support it. Wireless can offer flexible placement, while a wired network connection may suit a fixed production station. Weigh these needs alongside the printer’s other specifications.
To discuss a printer setup around your network and label workflow, contact the team about your connectivity requirements.
DuraFast Label Company Canada: Dymo LabelWriter label printers
DuraFast Label Company Canada offers reliable label printers for businesses choosing a desktop labelling option. For specialised tasks, a dedicated 2-inch vinyl tape device suits workflows built around tape rather than custom-printed product labels. Matching the format to the job helps you narrow your equipment choice.
For colour label production, professional digital printing systems offer versatile alternatives to a standard desktop setup. Consider the label material, required colour output and exposure conditions to identify the right printer category for your application. A focused discussion of these requirements can help clarify your next step.
Contact DuraFast Label Company Canada to discuss your label-printing needs.
Make your next printer decision with confidence
Turn your printer shortlist into a practical production plan. Decide who will prepare label files, where printing will happen and how finished labels will move to application. A simple workflow map can show whether your priorities are colour product labels, durable output or equipment for several production tasks.
DuraFast Label Company Canada offers VIPColor, Afinia and Primera label printers for colour label production. When discussing your options, share the label material, intended use and workflow requirements. These details help focus the conversation on a printer category that suits your operation, rather than on specifications in isolation.
If you’re ready to narrow down a vinyl label printer for your business, contact DuraFast Label Company Canada to discuss your requirements. A clear plan is a strong starting point for dependable label production.
Frequently Asked Questions
What is a vinyl label printer and what materials can it print on?
A vinyl label printer prints on vinyl stock or tape compatible with the device. The material must suit the printer’s feed system and printing method. Some standard inkjet printers can print stickers on compatible printable sticker paper, while vinyl tape requires a device designed for that format. Match the media to the printer, then test a sample to assess the finished label.
Best vinyl label printers available in Canada in 2026
The right printer depends on the label material, artwork and production workflow. Businesses can compare VIPColor, Afinia and Primera printers for colour printing needs. For a vinyl label printer, check that the model supports your intended stock and label format instead of choosing by brand alone. Build your shortlist around the labels you make and how your workspace handles printing.
Which printer is best for small business product labels in Canada?
For a small business making full-colour labels for jars, boxes or packaged goods, consider a colour-capable model that supports your stock and artwork. A vinyl label printer may suit product labels when its media compatibility matches the application. If you mainly print text identifiers, another printer type may fit better. Also consider design changes, application surfaces and where production takes place.
Where to buy vinyl label printers and supplies in Canada?
You can buy printers and related supplies from DuraFast Label Company Canada, a Canadian online retailer. Its range includes VIPColor, Afinia and Primera printers, as well as label supplies and printer consumables. Choose supplies compatible with your equipment and task, such as printable stock for product labels or vinyl tape for identification. Matching printer and supplies helps create a practical in-house workflow.
How to print and cut waterproof vinyl labels at home
Use vinyl stock compatible with the printer, and choose water-enhanced dye ink for labels exposed to water or condensation. Vinyl alone does not make the image waterproof, so test the stock and ink under expected conditions. Select a cutter whose cut style suits the label format, and confirm whether it is built into the printer or requires a separate finishing step.