Polylith thermal transfer tags in Canada: price and sizes
26th Oct 2026
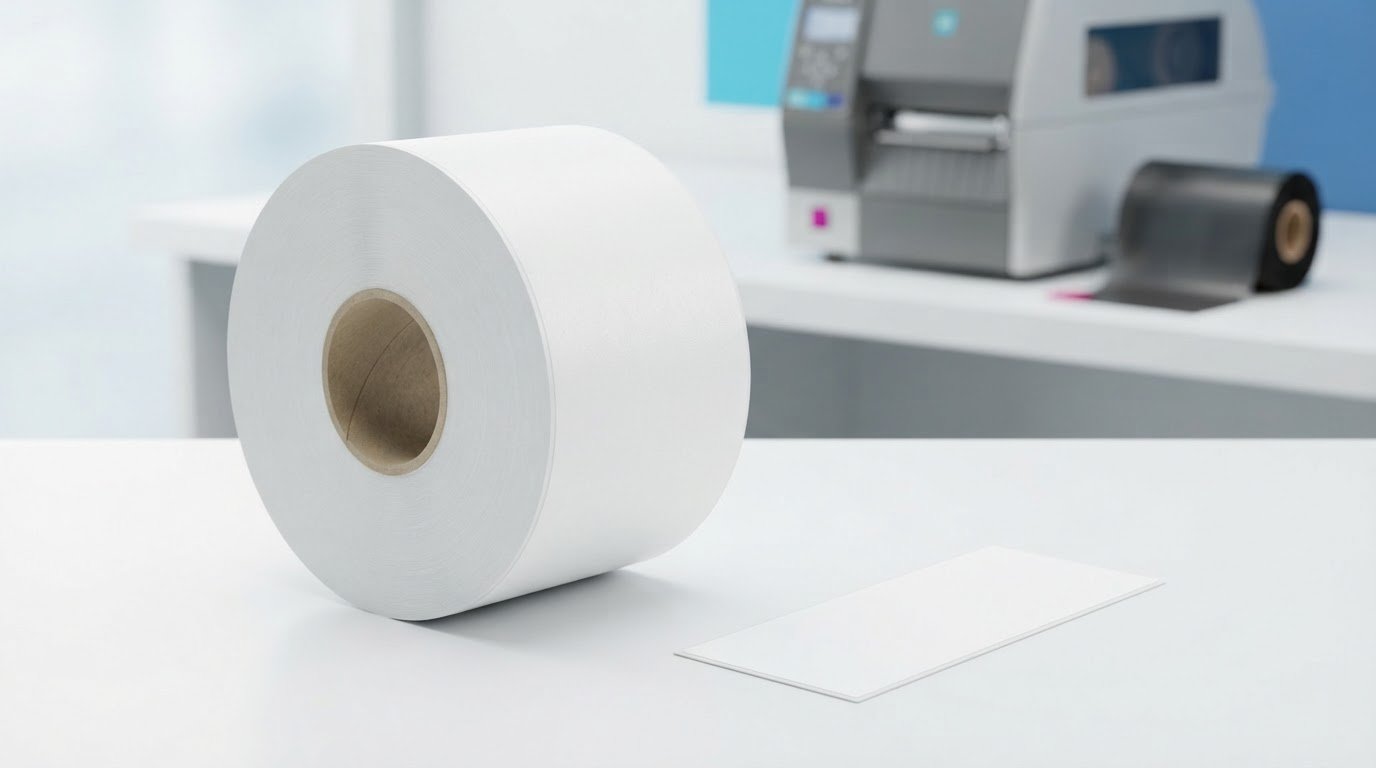
The practical starting point for polylith thermal transfer tags in Canada is the listed 3-by-6-inch format, which is 7 mil thick. The tag roll has a 3-inch core and an 8-inch outside diameter, specifications that help determine whether it fits your printer and production setup.
Choosing a polylith thermal transfer tag isn’t just about matching its dimensions to your printer. Material thickness, roll configuration, and how the tag will be used all affect whether it fits your workflow. Check these details before ordering to avoid media mismatches and keep printing consistent.
This guide covers tag dimensions and thickness, key roll specifications, and practical considerations for buying polylith thermal transfer tags in Canada. It also explains how to compare tag formats with your printer and application so you can choose media that suits your workflow.
Key Takeaways
- The listed Polylith tag format measures 3 by 6 inches and is 7 mil thick, with a 3-inch core and an 8-inch roll diameter.
- Compare the tag’s material and thickness with your application so you can choose a format suited to your handling needs.
- Product pricing is presented by order quantity, so the amount ordered affects the per-case cost.
- Plan around a one-case minimum order, then consider how your printer setup and ribbon choice fit the tags.
- Learn how to assess printer options and when DuraFast Label Company Canada’s VIPColor Label Printers may fit your broader label-printing needs.
Tag size and material thickness
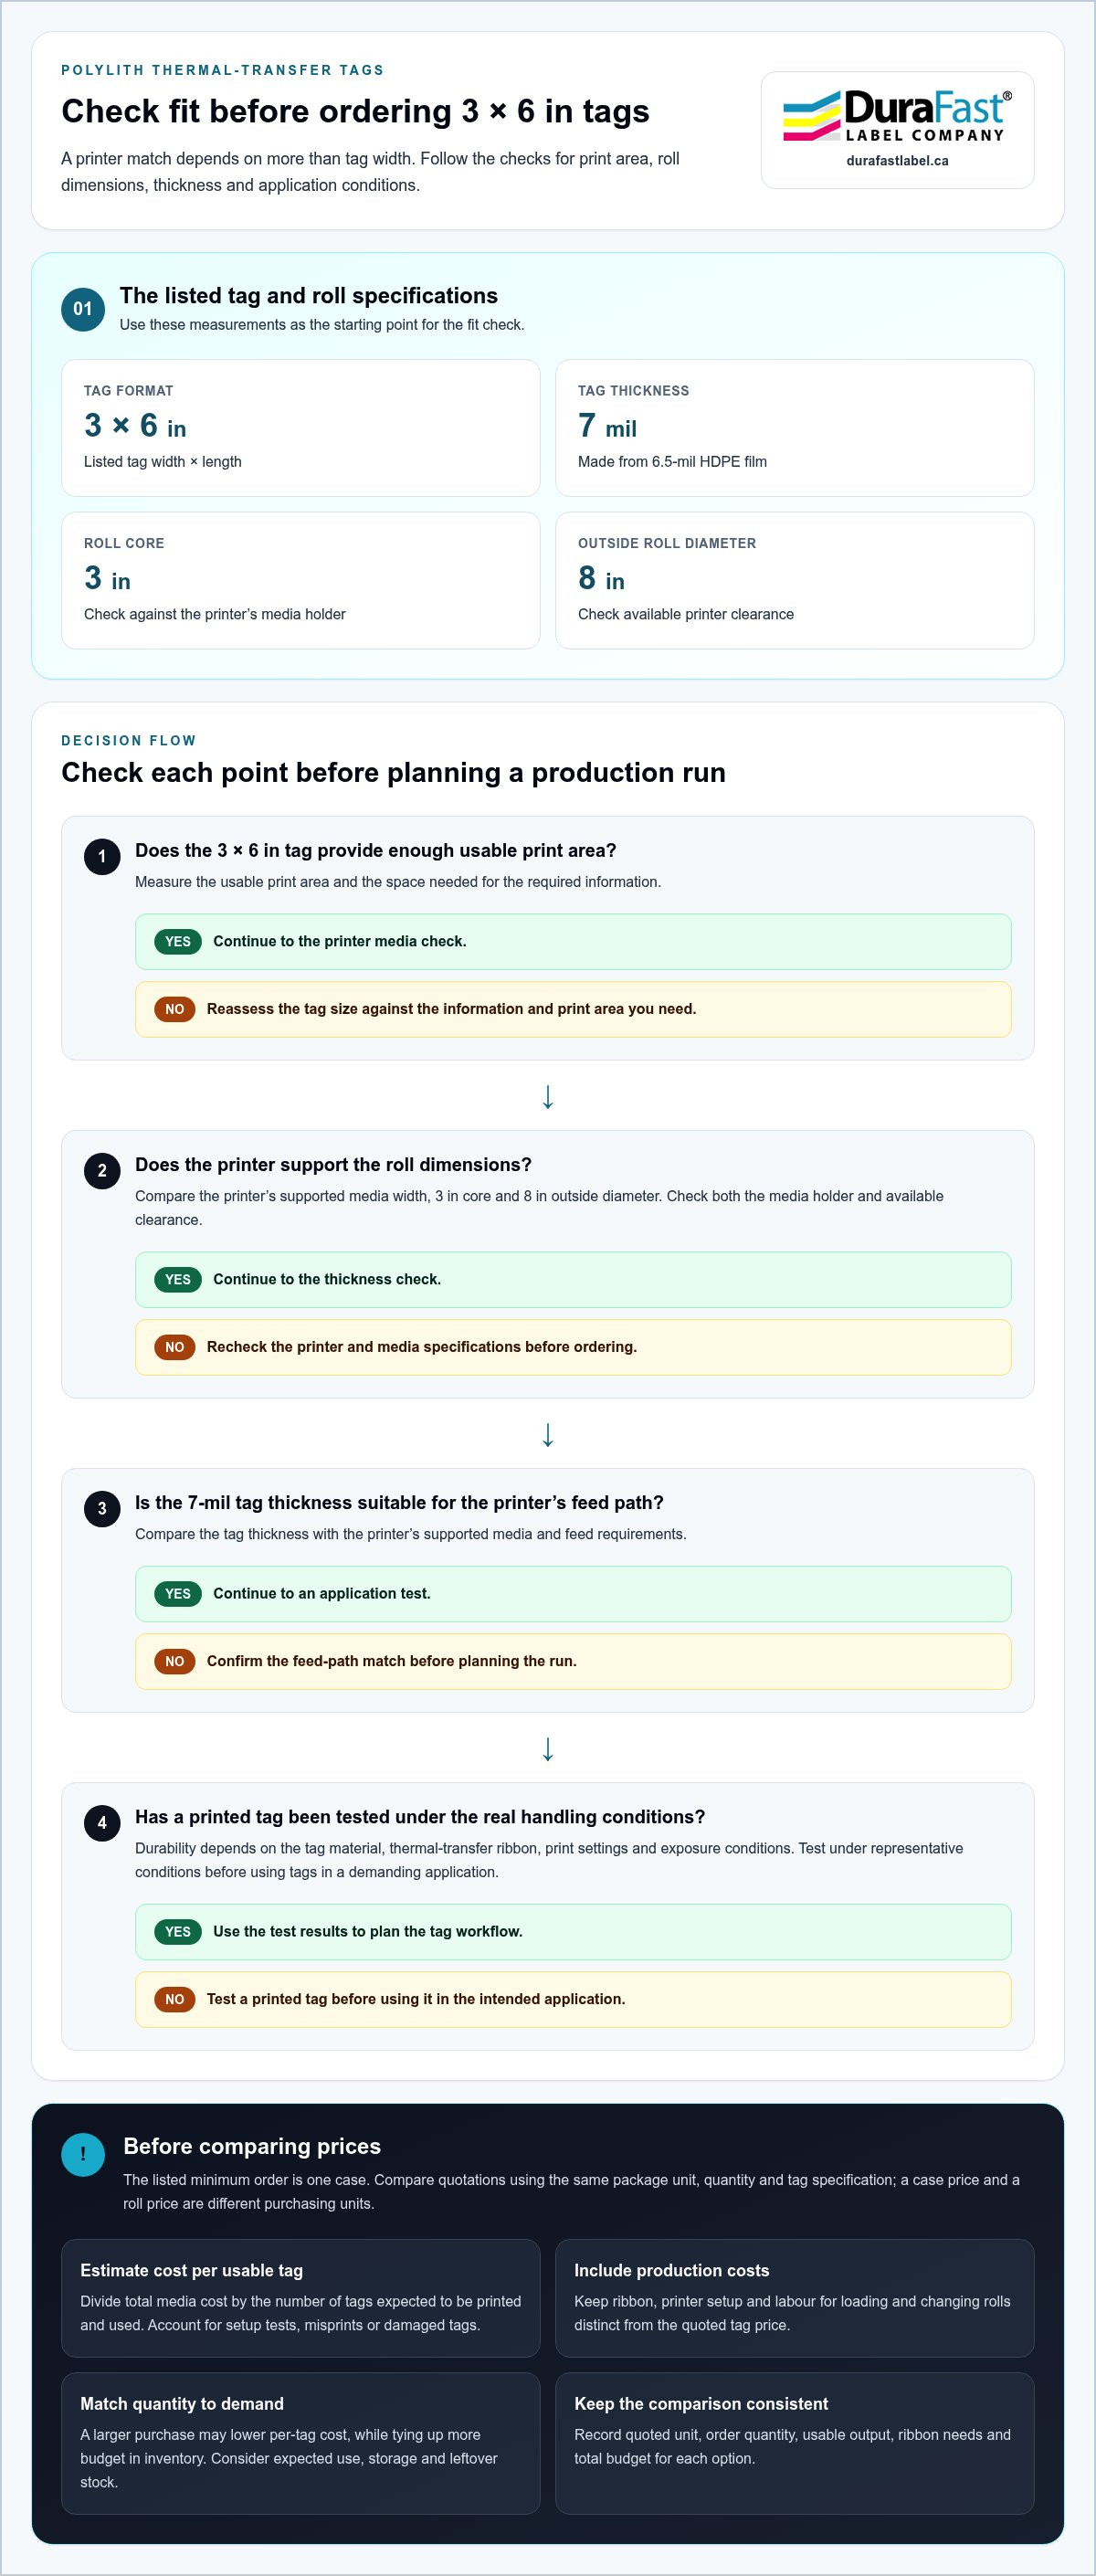
The listed Polylith thermal-transfer tag measures 3 inches by 6 inches. Its material thickness is 7 mil, and the tag is made from 6.5-mil HDPE film. These figures describe the tag format and material, helping you compare dimensions against your printer path and application. For businesses sourcing polylith thermal transfer tags in Canada, confirm both measurements before planning a run.
The roll has a 3-inch core and an 8-inch outside diameter. Check those dimensions against the printer’s media holder and available clearance. A roll may fit the label width but still exceed the printer’s supported diameter. Matching width, core, and roll diameter helps prevent loading problems and supports consistent feeding.
How do Polylith tags compare with polyester and polypropylene thermal-transfer labels? Polylith is made from HDPE film, while polyester and polypropylene are different substrates. Suitability depends on the material grade, print requirements, and handling conditions. Compare product specifications instead of assuming the material names indicate equivalent performance.
Are there Canadian labelling or workplace requirements relevant to Polylith tags? Requirements depend on the product, the information displayed, and the workplace application. Identify what the tag must communicate and the conditions workers will encounter before choosing its size and layout.
How durable are Polylith tags against water, chemicals, abrasion, and temperature extremes? Durability depends on the tag material, thermal-transfer ribbon, print settings, and exposure conditions. Test a printed tag under representative handling and environmental conditions before using it in a demanding application. A material description alone does not establish resistance to every chemical or temperature.
What are common uses for Polylith tags in Canadian industries? Their 3-by-6-inch format can suit identification tasks where a tag needs room for printed information. Consider applications such as product, inventory, or process identification, then match the tag size and printed content to how staff will read and handle it.
To choose a size, follow these steps:
- Measure the usable print area and required information.
- Check the printer’s supported media width, core, and roll diameter.
- Compare the 7-mil tag thickness with the feed path.
- Test a printed tag under the application’s actual handling conditions.
How can businesses order Polylith tags and request samples in Canada? The listed minimum order is one case. A sample request should identify the 3-by-6-inch format, printer setup, and intended use, so the material and feed can be evaluated before a production order. Compare thermal-transfer media formats with your printer requirements to keep the selection practical.
Review thermal-transfer label options alongside tag specifications when planning compatible media for your workflow.
Product price
Compare Polylith tag pricing by the unit used in each quotation. A case price and a roll price describe different purchasing units, so they aren’t directly comparable until you know how much media each includes. Record the quoted unit, quantity, and total before comparing options. For a Canadian purchase, keep the comparison in C$ and use the same currency throughout your budget.
Next, calculate the cost per usable tag by dividing the total media cost by the number of tags you expect to print and use. This is more informative than comparing package totals alone. If production involves setup tests, misprints, or damaged tags, account for them when estimating usable output. Treat the result as a planning figure, not a product price.
Order volume affects unit economics. A larger purchase may lower the per-tag cost, but it also ties up more budget in inventory. Compare the quantity with expected consumption. For seasonal use, weigh storage needs and leftover stock against any volume-based savings. A smaller replenishment may make more sense when demand is uncertain.
Separate media costs from other expenses in your purchasing calculation. Include the ribbon required for thermal-transfer printing, printer setup needs, and the labour involved in loading and changing rolls. These do not change the quoted tag price, but they affect the cost of producing finished tags. Keep each expense distinct so a lower media price does not obscure higher operating costs.
- Compare quotations using the same package unit and quantity.
- Calculate cost per usable tag, including expected setup waste.
- Match the order volume to your actual replenishment pattern.
- Include ribbon and production time in the operating budget.
For a practical purchasing review, compare the package description, quantity, and delivery terms in each quotation. Confirm that each describes the same material and tag format you intend to use. Otherwise, a lower total may be misleading. Keep the product specification beside the price so purchasing and production teams are comparing the same item.
Use a worksheet with columns for quoted unit, order quantity, usable output, ribbon needs, and total budget. Fill in each field from the quotation and your production plan. This shows the effect of order size without relying on the headline price and gives your team a consistent way to compare future purchases.
When reviewing thermal-transfer label options, compare their package units and specifications against your planned tag workflow. A consistent comparison helps connect purchasing decisions with printer operation, rather than treating media cost as the only factor.
Tag dimensions
The listed Polylith tag format measures 3 inches by 6 inches. That gives the tag a defined width and length for printer setup and printed-content planning. Measure both dimensions against the printer’s media path before ordering. The tag size also affects how much space remains for text, barcodes, or other identifiers. Sketching the intended layout can reveal whether the format suits your application.
Roll dimensions matter alongside the tag face. The Polylith roll has a 3-inch core and an 8-inch outside diameter. Check these measurements against the printer’s core holder and roll clearance. A compatible tag face won’t help if the roll core cannot mount or the roll diameter obstructs the printer. Record the printer’s accepted core and maximum roll diameter, then compare those details with the roll.
Other listed formats have different dimensions. White HDPE thermal-transfer tags measure 4 by 6 inches. Another listed format measures 4 inches wide by 6.5 inches long. Treat each measurement as a distinct product format, not as an alternative description of the 3-by-6-inch Polylith tag. Confirm the exact width and length on the product specification used for purchasing.
These differences can change how a tag fits the item and the printed layout. A 4-by-6-inch tag offers a wider face than a 3-by-6-inch tag. A 6.5-inch length extends beyond a 6-inch format. Choose based on the available attachment area, the information that must appear, and the printer’s media capacity. Keep the tag’s long edge orientation consistent with the printer feed direction.
Use this measurement sequence before selecting a roll:
- Measure the usable tag area on the item or attachment point.
- List the required text, barcode, and blank space.
- Compare the tag width and length with the printer’s media settings.
- Check the 3-inch core and 8-inch roll diameter against printer capacity.
For example, a 3-by-6-inch format may fit a narrower mounting area than a 4-by-6-inch tag. The longer 4-by-6.5-inch format may provide additional length, but only if the application has room. Layout software should use the selected tag’s exact dimensions. Otherwise, text or barcodes may print too close to an edge or beyond the usable area.
When comparing polylith thermal transfer tags in Canada, record tag-face measurements separately from roll measurements. Width and length describe each tag; core size and outside diameter describe the roll. Keeping all four specifications together helps purchasing and production teams compare formats and match the media to the intended printer.
Are Polylith tags compatible with thermal transfer printers and which ribbons are required?
Polylith tags are designed for thermal-transfer printing, which uses a heated printhead and ribbon. Compatibility still depends on the printer’s media path, supported tag stock, and roll configuration. Check the manual for accepted media type, width, thickness, core, and roll diameter. A printer that accepts labels may not handle every tag construction.
Ribbon choice matters because the ribbon transfers ink onto the tag surface. The exact ribbon type depends on the printer and the tag’s printable face. There isn’t enough product-specific information here to name a particular ribbon formulation. Instead, match the ribbon to the Polylith tag specification and the printer manufacturer’s guidance. Avoid choosing solely by ribbon width or price.
Use this setup sequence before production:
- Confirm that the printer supports thermal-transfer tags, not just paper labels.
- Compare the tag width and thickness with the printer’s media limits.
- Check that the roll core and outside diameter fit the holder.
- Select a ribbon compatible with both the printer and tag surface.
- Load a short test run and inspect the printed information.
Print a sample before committing to a full run. Check that text is legible, barcodes scan, and the image fits within the printable area. Rub the print gently and handle the tag as staff would during normal use. If it will face moisture, abrasion, or other exposure, test under those conditions too. This helps establish whether the ribbon and print settings suit the workflow.
Printer settings affect print quality. Heat, speed, darkness, and media tracking can all influence the result. Start with the printer’s recommended settings for the selected media and ribbon, then adjust after reviewing a test print. Excessive changes to heat or speed can affect image clarity or cause feeding problems. Record successful settings to keep repeat jobs consistent.
For a 3-by-6-inch tag, confirm the print direction and image dimensions in the label software. Set the document to the tag’s actual width and length. Then align text and barcodes with the printer’s feed direction. A correctly sized file helps prevent clipped content and wasted test prints.
Keep the material, ribbon, printer model, and settings together in a production record. If a second printer is introduced, compare its media limits and ribbon requirements before moving the job. This simple record helps operators reproduce a working setup and diagnose changes in print quality. For Canadian operations, a documented setup also makes routine replenishment clearer across purchasing and production teams.
For planning purposes, each roll of DuraFast Label Company thermal-transfer PolyPro tags contains 1000 tags. The tags are listed as in stock and generally ship the next business day; the page lists 12 units in current stock.
The related DuraFast Label Company industrial thermal-transfer 4-inch by 6-inch labels come 1000 per roll. These ordering details are separate from printer compatibility: confirm media dimensions, stock construction, and ribbon fit with the machine before setting up a production run.
What minimum order quantities and custom printing options do Canadian suppliers offer?
The listed minimum order quantity for these tags is one case. Use that amount as a starting point for planning inventory, production, and storage. Before ordering, estimate how quickly your operation will use the tags. Compare expected demand with the case quantity and replenishment schedule rather than ordering solely to reach a target unit cost.
“Custom printing” can describe different workflows. It may mean printing your own text and barcodes on blank tags using thermal-transfer equipment, or receiving tags already printed with customer-specific content. For in-house printing, prepare the artwork and variable data in label software, then print on compatible tags with the selected printer and ribbon.
An inventory tag, for example, might pair a product description with a barcode. A process tag could include a batch identifier and handling instruction. Decide which fields stay the same and which change from tag to tag. Save fixed details in a template, then enter changing identifiers or draw them from production data. This defines the print job before you load the media.
Use this preparation checklist before ordering a case:
- Estimate tag consumption from your planned production runs.
- Confirm the case quantity against your storage and replenishment plan.
- List the fixed text, variable fields, and barcode content.
- Set the label software layout to the exact tag dimensions.
- Run a test print and inspect alignment before the full batch.
A test print can catch layout problems early. Check that important text is readable and barcodes fit within the printable area. If the tag will be used in a demanding workflow, assess a sample under those conditions. Use the results to refine the template and printer settings before printing the full quantity.
When preparing a purchase request, bring your requirements together in one concise specification. Include the tag format, quantity, printer setup, ribbon, and intended printed content. For a custom layout, provide a clear example of the information hierarchy. This distinguishes a request for blank media from one for preprinted tags.
For Canadian operations, the one-case minimum is a useful planning boundary. Match it to expected consumption, available storage, and the time needed to prepare print files. If you need to discuss ordering requirements or tag specifications, send your tag and printing requirements with the details your purchasing team has prepared.
Base the order on the workflow you have defined. The minimum order quantity is one case, so make sure that amount suits your planned use and storage capacity. Then finalize the tag dimensions, printer setup, ribbon, and content specification together to keep the media choice aligned with the print plan.
Before submitting the request, check that the sample layout shows the intended fixed text, variable fields, and barcode content. Record any changes identified during the test print and use the revised layout for production. If you need customer-specific printing rather than in-house printing, state that clearly and describe the required content.
DuraFast Label Company Canada: VIPColor Label Printers
DuraFast Label Company Canada offers VIPColor label printers for businesses with a separate colour-label production need. These printers use Memjet inkjet technology, so they are not substitutes for the thermal-transfer printers used with Polylith tags. Keeping the workflows distinct helps you select equipment suited to each media type.
For colour product labels, compare printer features with your operation’s needs. The VP700 adds an internal label unwinder, which helps protect the roll from environmental debris in dusty settings. Consider these models when colour labels are part of your operation alongside thermal-transfer tag printing.
Contact DuraFast Label Company Canada or visit durafastlabel.ca to explore VIPColor printer options.
Plan your next label-production step
Let your application guide the next purchasing decision. Consider how tag printing fits alongside other identification needs, such as producing colour product labels. Thermal-transfer tags and colour labels use different printing workflows, so separate equipment for each task can keep production requirements clear.
For Canadian businesses adding colour-label production, DuraFast Label Company Canada offers VIPColor and Afinia label printers. These options can support a separate colour-label workflow alongside your tag process.
When planning polylith thermal transfer tags in Canada, align your media and printer requirements with the work your team performs. A clear specification makes it easier to assess the product format and make an informed purchasing decision.
Contact DuraFast Label Company Canada to discuss your label-printing needs and take the next step with confidence.
Frequently Asked Questions
What materials and sizes are available for Polylith thermal transfer tags?
Polylith tags use HDPE film and are listed in a 3-by-6-inch format. The film is 6.5 mil, with a finished tag thickness of 7 mil. Other listed tag formats include white HDPE in a 4-by-6-inch size. Before choosing, match the specific material and dimensions to the item being identified, the printer’s media settings, and the amount of information your layout needs.
Which Canadian suppliers sell Polylith thermal transfer tags?
DuraFast Label sells thermal-transfer Polylith tags in Canada. Before ordering, prepare the required tag size, your printer’s media specifications, and the intended application. These details help you match the format to your workflow and plan the order. If you are also setting up printing, keep thermal-transfer tag requirements separate from any colour-label production needs.